


Confidentiality and integrity of information go hand in hand. It needs to handle with proper access management mechanism. Access management is an important issue and if not handled properly you might lose all your resources to the attacker. Handling authentication is one of the trickiest jobs for a developer.
In this article, we will be looking at how to handle authentication with Nodejs using JSON Web Token (JWT) by creating a restful APIs for our application
Pre-requisites
Install Nodejs and npm on your workstation
Recommendation
I highly recommend to code while learning it because,
“Practice is everything”
What is covered?
We will be developing Restful APIs, authenticating the users of our app with JSON web tokens (JWT), perform CRUD operations via authenticated routes.
Stack
- Node.js
- MongoDB
Topics:
- Creating a database for our application — We will be using MongoDB atlas
- Rest APIs and Mongoose
- JWT Authentication
Brief about the application:
We are creating a blog application where the user can signup, signup, post a blog, comment on the post, with a complete authentication system. We will also be deploying our application on Heroku.
Setting Up MongoDB database on MongoDB Atlas
- SignUp/Login
- Create a new database
Create a package.json file into the root of our project folder “nodejs_auth”:
mkdir nodejs_auth
npm init
If you want to skip all the question asked during the creation of package.json with the above command, run:
npm init -y
Let’s Install the latest version of packages needed to develop our application
npm install express mongodb mongoose bcryptjs jsonwebtoken validator
Express Js
Express.js is a minimal and flexible Nodejs framework which provides lots . of features to develop web and mobile applications. It's easy to create an API with HTTP utility and middlewares with Express.js
MongoDB
MongoDB Node.js driver provides callback-based and Promise-based interaction with MongoDB. We will especially use to achieve specific goals with this as we will see further in this tutorial
bcryptjs
This will allow us to encrypt user passwords before storing it to the database.
JSON web token
As HTTP is a stateless protocol, we will need some mechanism to enable our server to identify whether our users are registered with the application or whether they are authorized or not.
JWT (JSON Web Token) is usually used to send information that can be trusted and verified using a digital signature.
- A user sends a signup/login post request to the server and it sends JWT token as a response. This JWT token will be stored in our database and on the client-side. You may store in local storage or cookies or any other storage mechanisms like Memcache or Redis.
- We will append the token in the request Authorization header
- When a user will make a request to another API, the server will check whether the JWT token provided by the client is valid or not, it will return a response
- Unless and until the user logs out of the application, our server will check whether the provided token is valid, after logging out it will destroy the token from the local storage
Redis
Redis is an open-source (BSD licensed), in-memory data structure store, used as a database, cache and message broker…
Validator
This package will allow us to validate the fields of our schema for registering it into Db’s collections
Nodemon
Install Nodemon to reload/restart our server automatically once the code of our application is saved. This will be one of the development dependency and won't be used in the production environment
npm install nodemon --save-dev
Here’s how our package.json will look like:
{
  "name": "nodejs_auth",
  "version": "1.0.0",
  "description": "",
  "main": "index.js",
  "scripts": {
    "dev": "env-cmd ./config/dev.env nodemon src/index.js",
    "start": "node src/index.js"
  },
  "keywords": [],
  "author": "",
  "license": "ISC",
  "dependencies": {
    "bcryptjs": "^2.4.3",
    "express": "^4.16.4",
    "jsonwebtoken": "^8.5.1",
    "mongodb": "^3.2.2",
    "mongoose": "^5.4.20",
    "validator": "^10.11.0"
  },
  "devDependencies": {
    "nodemon": "^1.18.10"
  }
}
As you see, in scripts, kindly add dev and start to the scripts
Create an index.js file into the root of our project folder “nodejs_auth”:
mkdir src
touch src/index.js
Set up the express server with below code
const express     = require('express')
const app         = express();
const port        =  process.env.PORT || 3000

app.listen(port,() =>{
    console.log('server is up on ' + port);
})
Creating our mongoose.js file which will handle the connectivity to the atlas database
// Create a mongoose.js file into the DB folder

//create db folder on the root of our app
mkdir db
touch db/mongoose.js
Connect your DB with below code
const mongoose = require('mongoose');

mongoose.connect('mongodb://<user>:<password>@ds127644.atlas.com:27644/nodeauth',{
    useNewUrlParser: true,
    useCreateIndex: true
}).then(() =>{
  console.log('connected to database');
}).catch(() =>{
  console.log('failed connected to database');
});
We will first load out mongoose package and then access the methods/function, we will connect it with our database by providing the URL string with username and password.
useNewUrlParser: This will parse the MongoDB connection string
useCreateIndex: Mongoose will create the index on the DB and collections
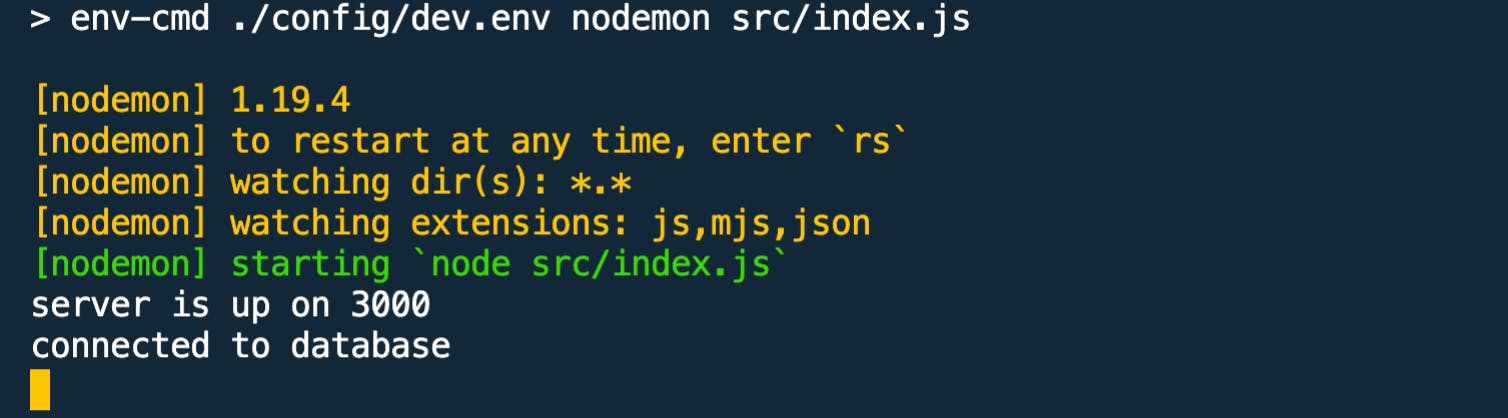
From your root folder, kindly run npm run dev, and you will see our application up and running with our database connected
Create the users, post and comment schemas
Create a model folder at the root of our project folder
mkdir model
touch model/user.js model/post.js model/comment.js</span>
User Model
const mongoose  = require('mongoose')
const validator = require('validator')
const bcrypt    = require('bcryptjs')
const jwt       = require('jsonwebtoken')
const Post      = require('./post')
const UserSchema  = new mongoose.Schema({
    name:{
        type: String,
        required: true,
        trim: true
    },
    age:{
        type: Number,
        default: 0,
        validate(value){
            if(value < 0){
                throw new Error('Age must be a positive number')
            }
        }
    },
    email:{
        type: String,
        required: true,
        unique:true,
        trim: true,
        validate(value){
            if(!validator.isEmail(value)){
                throw new Error('Email is invalid!')
            }
        }

    },
    password:{
        type:String,
        required:true,
        trim:true,
        minlength: 7,
        validate(value){
            if(validator.isEmpty(value)){
                throw new Error('Please enter your password!')
            }else if(validator.equals(value.toLowerCase(),"password")){
                throw new Error('Password is invalid!')
            }else if(validator.contains(value.toLowerCase(), "password")){
                throw new Error('Password should not contain password!')
            }
        }
    },
    tokens:[{
        token:{
            type:String,
            required: true
        }
    }],
    createdAt:{
        type: Date,
        default: Date.now
    }
});

const User = mongoose.model('User', UserSchema);

module.exports = User;
We will import our mongoose and validator package to create schemas and validate the data before an insert/update is performed.
For users, we have fields such as name, email, age, password, createdAt, tokens. The token array will have all our tokens generated when user sign-up/sign-in to our mobile/web application. Once a user opts to log out, we will destroy the token.
Post model
const mongoose = require('mongoose');

const PostSchema  = new mongoose.Schema({
    title:{
        type:String,
        unique:true,
        required: true,
        trim: true
    },
    description:{
        type: String,
        required:true,
        trim: true
    },
    author:{
        type: mongoose.Schema.Types.ObjectId,
        required:true,
        ref:'User'
    },
    createdAt:{
        type: Date,
        default: Date.now
    }
});


const Post = mongoose.model('Post', PostSchema);

module.exports = Post
We will have a title, description, author, createdAt as our fields for post schema.
Author field is to know which user has created a post. This will help us setting user/post relationship further in our tutorial
author:{
 type: mongoose.Schema.Types.ObjectId,
 required:true,
 ref:'User'
}
Comment Model
const mongoose = require('mongoose');

const CommentSchema  = new mongoose.Schema({
    comment:{
        type:String,
        trim: true
    },
    author:{
        type: mongoose.Schema.Types.ObjectId,
        required:true,
        ref:'User'
    },
    postId:{
        type: mongoose.Schema.Types.ObjectId,
        required:true,
        ref:'Post'
    },
    createdAt:{
        type: Date,
        default: Date.now
    }
});

const Comment = mongoose.model('Comment', CommentSchema);

module.exports = Comment
We will have a comment, author, postId, createdAt fields for our comment model.
PostId: To know which posts gots comments (post/comment relationship)
Author: To know which user has commented (user/comment relationship)
Create user and post routes
Routing refers to the application endpoints which will pass the request to the server and server will send back the response to the client via those routes. We will be using an express router in our tutorial
Create a folder named router to the root of the project folder and create user and post routes
mkdir router
touch router/user.js router/post.js
User Route
//user route initial setup

const express     = require('express');
const router      =  new express.Router()
const User        = require('../models/user')
const {ObjectID}  = require('mongodb')

module.exports = router
Post Route
//post route initial setup

const express     = require('express');
const router      =  new express.Router()
const Post        = require('../models/post')
const {ObjectID}  = require('mongodb')

module.exports = router
Import the User and Post to our main file — index.js
This is how our final index.js file will look like.
//final index.js file

const express     = require('express')
require('./db/mongoose');
const userRoutes = require('./router/user')
const PostRoutes = require('./router/post')

const app   = express();
const port  =  process.env.PORT || 3005

app.use(express.json())

app.use(userRoutes)
app.use(PostRoutes)


app.listen(port,() =>{
    console.log('server is up on ' + port);
})
Javascript Promises to Async/Await
We will be using Async/Await to work with promises with asynchronous functions.
- Putting Async in front of the function expects it to return the promise. This means all async function has a callback
- Await can be used for single promises to get resolve or reject and return the data or error
- Async/Await behaves like synchronous code execution
- There can be multiple await in the single async function
- We will be using try/catch construct, which make async/await easy to handle synchronous and asynchronous code
- Async/Await helps you to deal with callback hell
Http Status Code
These are some of the status code which we will be using for our application
200: This is the default status which will be passed to the client
201: It indicates that response is created and send back to the client
400: It indicates a bad request sent to the server
500: It indicates there are some internal server issues, for e.g. server is down
HTTP Methods
HyperText Transfer Protocol (HTTP) is a stateless protocol, which means that the client and server know how to handle the data for that instance only. Once the browser initiates the request and sends to the server, the server will send a response back to the client. On every request initialized, a new connection is established between client and server. The widely-used HTTP verbs are GET, POST, PUT, PATCH, DELETE
GET: Itis used to retrieve all the information from the server using the URI and does not modify any kind of data
POST: It is used to send data to the server
PATCH: It is used to update and modifies the resource partially
PUT: It is used to replace the resource entirely, unlike the PATCH method
DELETE: This will delete the resource
Create User API endpoints with JWT Authentication
//Add below code to routes/user.js

router.post('/users', async (req,res) => {
    const user = new User(req.body);
    try{
        const token = await user.newAuthToken()
        res.status(201).send({user, token})
    }catch(e){
        res.status(400).send(e)
    }
})
NewAuthToken: This function will generate the jwt token which we will be creating in our models/user.js file
//generate jwt token

UserSchema.methods.newAuthToken = async function(){
    const user  = this
    const token =  jwt.sign({ _id: user.id.toString() },'thisismynewblog', {expiresIn: "7 days"})
    user.tokens = user.tokens.concat({ token })
    await user.save()
    return token
}
jwt.sign
Payload: The first parameter here is the payload, we have provided the id as a string literals
Secret key: The second parameter is a secret key
Optional Parameter: The third param is expiresIn is the time in which our token will get expired
To encrypt the user password, we will be using bcrypt. This will be handled in our user model by using the “pre” hook on our user schema. Pre-hook will get invoked before the user is saved into the database
The code is as below:
UserSchema.pre('save', async function(next){
    const user = this
    if(user.isModified('password')){
        user.password = await bcrypt.hash(user.password, 8)
    }
    next()
})
Authentication Middleware
const jwt  = require('jsonwebtoken')
const User = require('../models/user')

const auth = async (req,res,next) => {
    try {
        const token = req.header('Authorization').replace('Bearer', '').trim()

        const decoded  = jwt.verify(token, 'thisismynewblog')

        const user  = await User.findOne({ _id:decoded._id, 'tokens.token': token})

        if(!user){
            throw new Error()
        }
        req.token = token
        req.user = user
        next()
    } catch (error) {
        console.log(error)
        res.status(401).send({error:'Please authenticate!'})
    }
}

module.exports = auth
Our middleware will verify whether the jwt token provided from the request header is authorized or not. If yes, it will authenticate successfully and call next() function to execute further code, otherwise, it throws an error as “Please authenticate”
Creating Login, Read, Edit, Delete, Logout API endpoints for our user
User Login
router.post('/users/login', async (req, res) => {
    try {
        const user  = await User.checkValidCredentials(req.body.email, req.body.password)
        const token = await user.newAuthToken()
        res.send({ user, token})
    } catch (error) {
        res.status(400).send()
    }
})
/users/login: Our async function takes two parameters, req and res which will take all the request from the client-side sent in req.body and respond with user object and the token generated
checkValidCredentials: This take email and password from the request body and checks whether the user of our app is registered or not
Read user profile
router.get('/users/me', authenticate ,async (req,res)=> {
   res.send(req.user)
})
/users/me: This router will enable to see users their own profile and that’s where the authentication middleware comes into the picture. Here, we are sending back the user who has requested.
Edit user profile
///update user details

router.patch('/users/me',authenticate ,async (req,res) => {
    const updates  = Object.keys(req.body)
    const allowedUpdates = ["name", "email", "password", "age"]
    const isValidOperation = updates.every((update) => allowedUpdates.includes(update))
    const _id =  req.user._id

    if(!isValidOperation){
        res.status(400).send({error:'Invalid request'})
    }

    if (!ObjectID.isValid(_id)) {
        return res.status(404).send();
    }

    try {
        updates.forEach((update) => req.user[update] = req.body[update])
        await req.user.save()
        res.send(req.user);
    } catch (error) {
        res.status(400).send()
    }

})
/users/me: It will update user details. Allowed update fields are name, email, password, age. If provided other parameters from the req, it will be invalid
Delete user
//delete your own profile

router.delete('/users/me', authenticate, async (req,res) => {
    if (!ObjectID.isValid(req.user._id)) {
        return res.status(404).send();
    }

    try {
        await req.user.remove()
        res.send(req.user)
    } catch (error) {
        res.status(500).send()
    }
})
Route /users/me will enable the user to delete their own profile
User Logout
router.post('/users/logout', authenticate, async (req, res) => {
    try {
        req.user.tokens = req.user.tokens.filter((token) =>{
         return token.token !== req.token
        })
        await req.user.save()
        res.send()
    } catch (error) {
        res.status(500).send()
    }
})


router.post('/users/logoutall', authenticate, async (req, res) => {
    try {
        req.user.tokens = []
        await req.user.save()
        res.send()
    } catch (error) {
        res.status(500).send()
    }
})
Once the users log out, the token will be completely destroyed.
/users/logout: As we already have a token in the request, as we had set this in the authentication middleware, we will filter it from the token array and if it's not equal we will delete the request token.
/users/logoutall: This will remove all the tokens from the array
Creating Post API endpoint
We will create the posts API endpoints where our authenticated users will be able to create, edit, delete and read the posts
Create Post
router.post('/posts',authenticate,async (req,res) => {
    const post =  new Post({
        ...req.body,
        author: req.user._id
    })
    try {
        await post.save()
        res.status(201).send(post)
    } catch (error) {
        res.status(400).send(error)
    }
})
Save the post created by the authenticated user to the DB
Read All Post
//A user can read all the post

router.post('/posts',authenticate,async (req,res) => {
    const post =  new Post({
        ...req.body,
        author: req.user._id
    })
    try {
        await post.save()
        res.status(201).send(post)
    } catch (error) {
        res.status(400).send(error)
    }
})
Read Single Post
router.get('/posts/:id',authenticate, async (req,res) => {
    const _id =  req.params.id
    if (!ObjectID.isValid(_id)) {
        return res.status(404).send();
    }
    try {
        const post = await Post.findOne({ _id, author: req.user._id })
        if(!post){
            return res.status(404).send()
        }
        res.send(post);
    } catch (error) {
        res.status(500).send()
    }
})
Edit Post
//user can edit his own posts
router.patch('/posts/:id',authenticate, async (req, res) => {
    const _id = req.params.id
    const updates = Object.keys(req.body);
    const allowedUpdates = ["description", "title"]
    const isValidOperation  = updates.every((update) => allowedUpdates.includes(update))
    if(!isValidOperation){
        res.status(400).send({error:'Invalid updates'})
    }
    if (!ObjectID.isValid(_id)) {
        res.status(404).send();
    }
    try {
        const post = await Post.findOne({_id: req.params.id, author:req.user._id})

       if(!post){
        res.status(404).send();
       }

       updates.forEach((update) => post[update] = req.body[update])
       await post.save()

       res.send(post);
    } catch (error) {
        res.status(400).send();
    }
})
Delete Post
router.delete('/posts/:id', authenticate,async (req,res) => {
    const _id = req.params.id
    if (!ObjectID.isValid(_id)) {
        return res.status(404).send();
    }
    try {
        const deletepost = await Post.findOneAndDelete({_id:_id, author: req.user._id})
        if (!deletepost) {
            return res.status(404).send();
        }
        res.send(deletepost)
    } catch (error) {
        res.status(500).send()
    }
})
Create Comment API Endpoint
//Posts comment on a blogpost

router.post('/posts/:id/comment',authenticate, async (req,res) => {
    const _id = req.params.id
    const userid = req.user._id

    if (!ObjectID.isValid(_id)) {
        return res.status(404).send();
    }

    if (!ObjectID.isValid(userid)) {
        return res.status(404).send();
    }

    const comment = new Comment({
        ...req.body,
        author: userid,
        postId: _id
    })

    try {
        await comment.save()
        res.status(201).send(comment)
    } catch (error) {
        res.status(400).send(error)
    }

})
Get all the comments for a post
//get all the comments related to the post
router.get('/posts/:id/comment', async (req,res) => {
    try {
        const post = await Post.findOne({_id: req.params.id})
        await post.populate('comments').execPopulate()
        res.send(post.comments)
    } catch (error) {
        res.status(500).send()
    }
})
const post = await Post.findOne({_id: req.params.id})
await post.populate('comments').execPopulate()
res.send(post.comments)
Find the post with the findOne method of mongoose and populate all the comments. To make this code run, insert below code in our post model.
//virtual method on post schema

PostSchema.virtual('comments', {
    ref: 'Comment',
    localField: '_id',
    foreignField: 'postId'
})
A virtual method will allow accessing all the comments of the post.
localField: is the id on the posts schema
foriegnField: is the field on comment schema
//virtual method on user schema

UserSchema.virtual('posts', {
    ref: 'Post',
    localField: '_id',
    foreignField: 'author'
})
Deploying our application on Heroku
Creating the production environment for our application
Install env-cmd: This makes all our environment variable available all over to our scripts
npm install env --save-dev
Create a config folder in the root of our project
mkdir config
touch config/env.dev
The env.dev file will contain all our environment variables
MONGODB_URL=yoururlstring
JWT_SECRET=yourtopsecretcode
PORT=portonwhichtheappwillrun
In package.json, make below changes script
"scripts": {
    "dev": "env-cmd ./config/dev.env nodemon src/index.js",
    "start": "node src/index.js"
  }
Replace your mongo string url with process.env.MONGODB_URL in the db/mongoose.js file& your jwt-secret with process.env.JWT_SECRET in the middleware/auth.js & models/user.js
- Signup for your Heroku account.
- Into the root folder of our application “nodejs_auth”, run below commands
heroku create

heroku config:set PORT=3000 MONGODB_URL=mongodburlstring JWT_SECRET=yoursecret

git push heroku master
Conclusion
We have learned how to authenticate users with Nodejs and JWT.
I have created a repository of our app on my Github, please feel free to fork the code and try to run all the commands/code which I have mentioned above
I have also uploaded the Postman collection for Testing all our APIs of this app on GitHub.
If you liked it please leave some love to show your support. Also, leave your responses below and reach out to me if you face any issues.