


This article is a part of our ongoing DevOps series.
As a part of our devops series, we have learned:
- How to set up Jenkins as our build server.
- How to dockerize our Next.js app with the custom server using Node.js
- How to integrate Ansible and Docker with Jenkins.
- How to deploy Next.js application on Ansible
In this article, we are going to learn how can we deploy our Next.js application on Kubernetes.
Pre-requisites
- Basic knowledge of Kubernetes is required
- AWS account
What is Kubernetes?
Kubernetes is a popular container orchestration tool, which runs over our containers ( created on any Container Engine e.g. Docker, Podman, CRI-O etc.) and manages for automating deployment, scaling, and management of containerized applications. With Kubernetes, you can run any Linux container across private, public, and hybrid cloud environments. Kubernetes provides some edge functions, such as Loadbalancer, Service discovery, and Roled Based Access Control(RBAC).
Salient features of Kubernetes
- Horizontal Scaling
- Auto Scaling
- Service Discovery
- Automated rollbacks & rollouts
- Health check & Self-healing
- Load Balancer
- Canary Deployment.
All our YAML templates and the codebase is in this repository for your reference.
Installing & Configuring Kubernetes on AWS server
Create an EC2 Instance in your AWS console. Here is the simple guide shows you how to do the same. Please select the Ubuntu operating system for the demo.
Create a security group. Here is the guide to show the same.
Login to the server
ssh -i jenkins_aws_key.pem ubuntu@your-server-public-IP
sudo su -
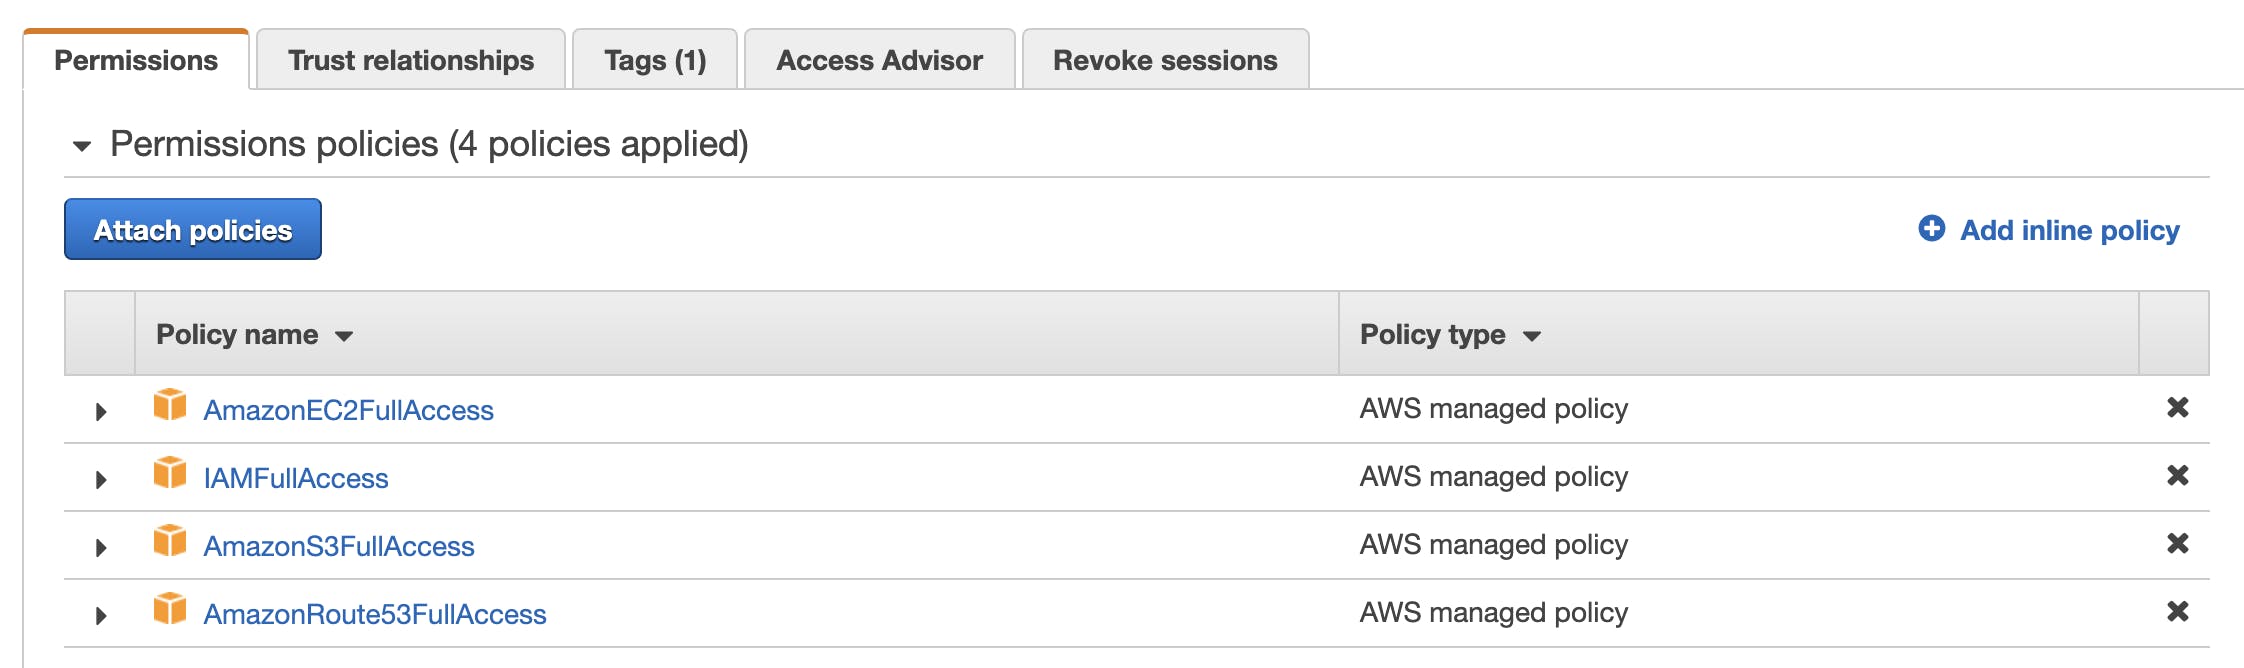
Create IAM role
- We would be providing S3, Route53, and EC2, IAM full access.
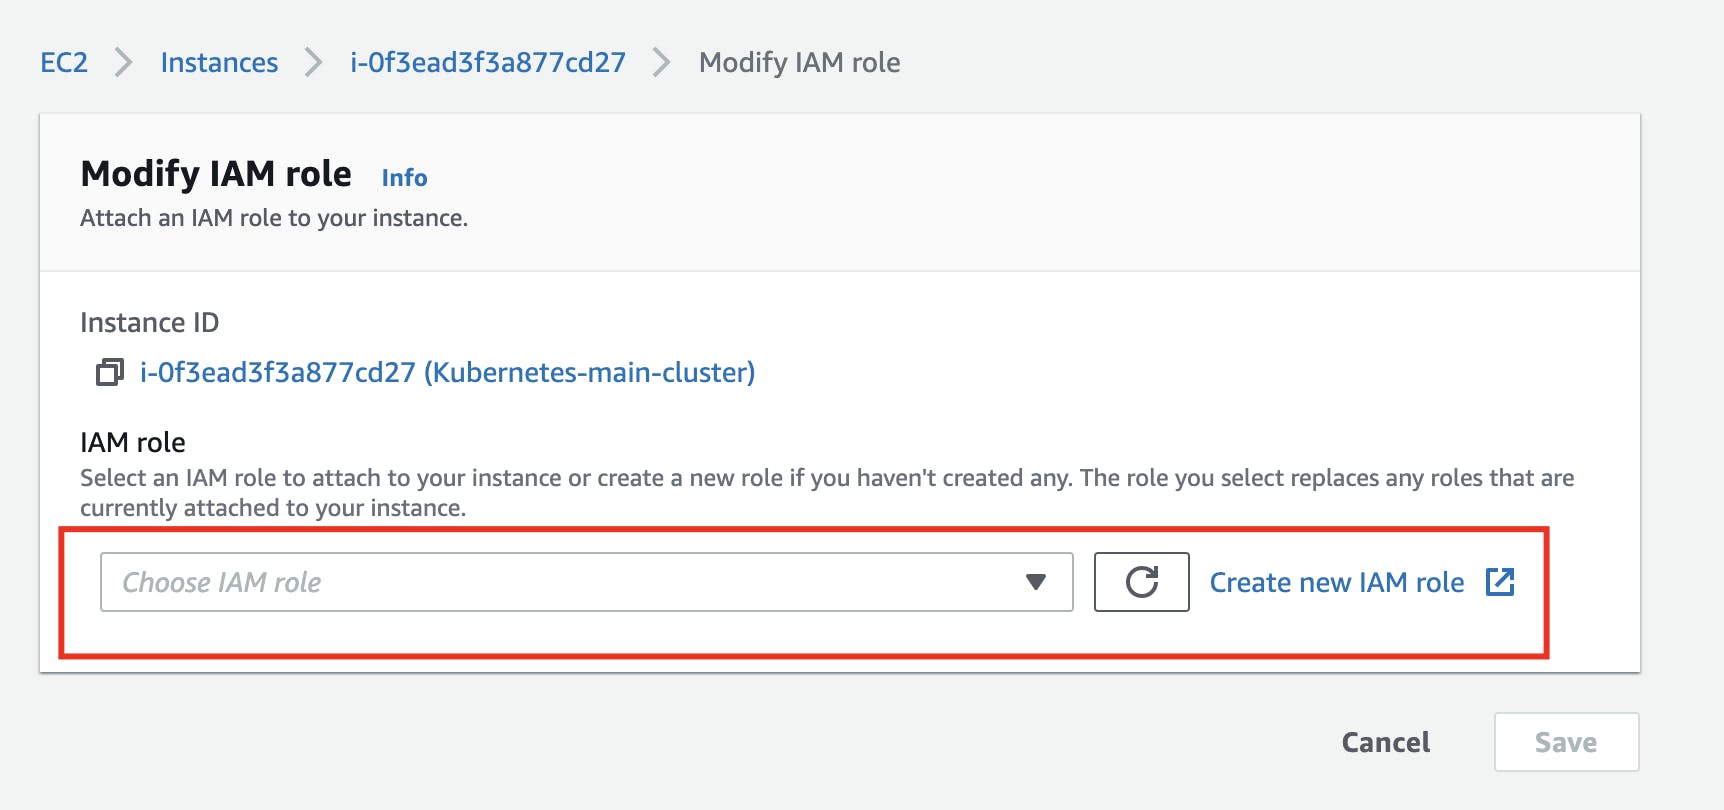
Attach the IAM role of your Kubernetes instance
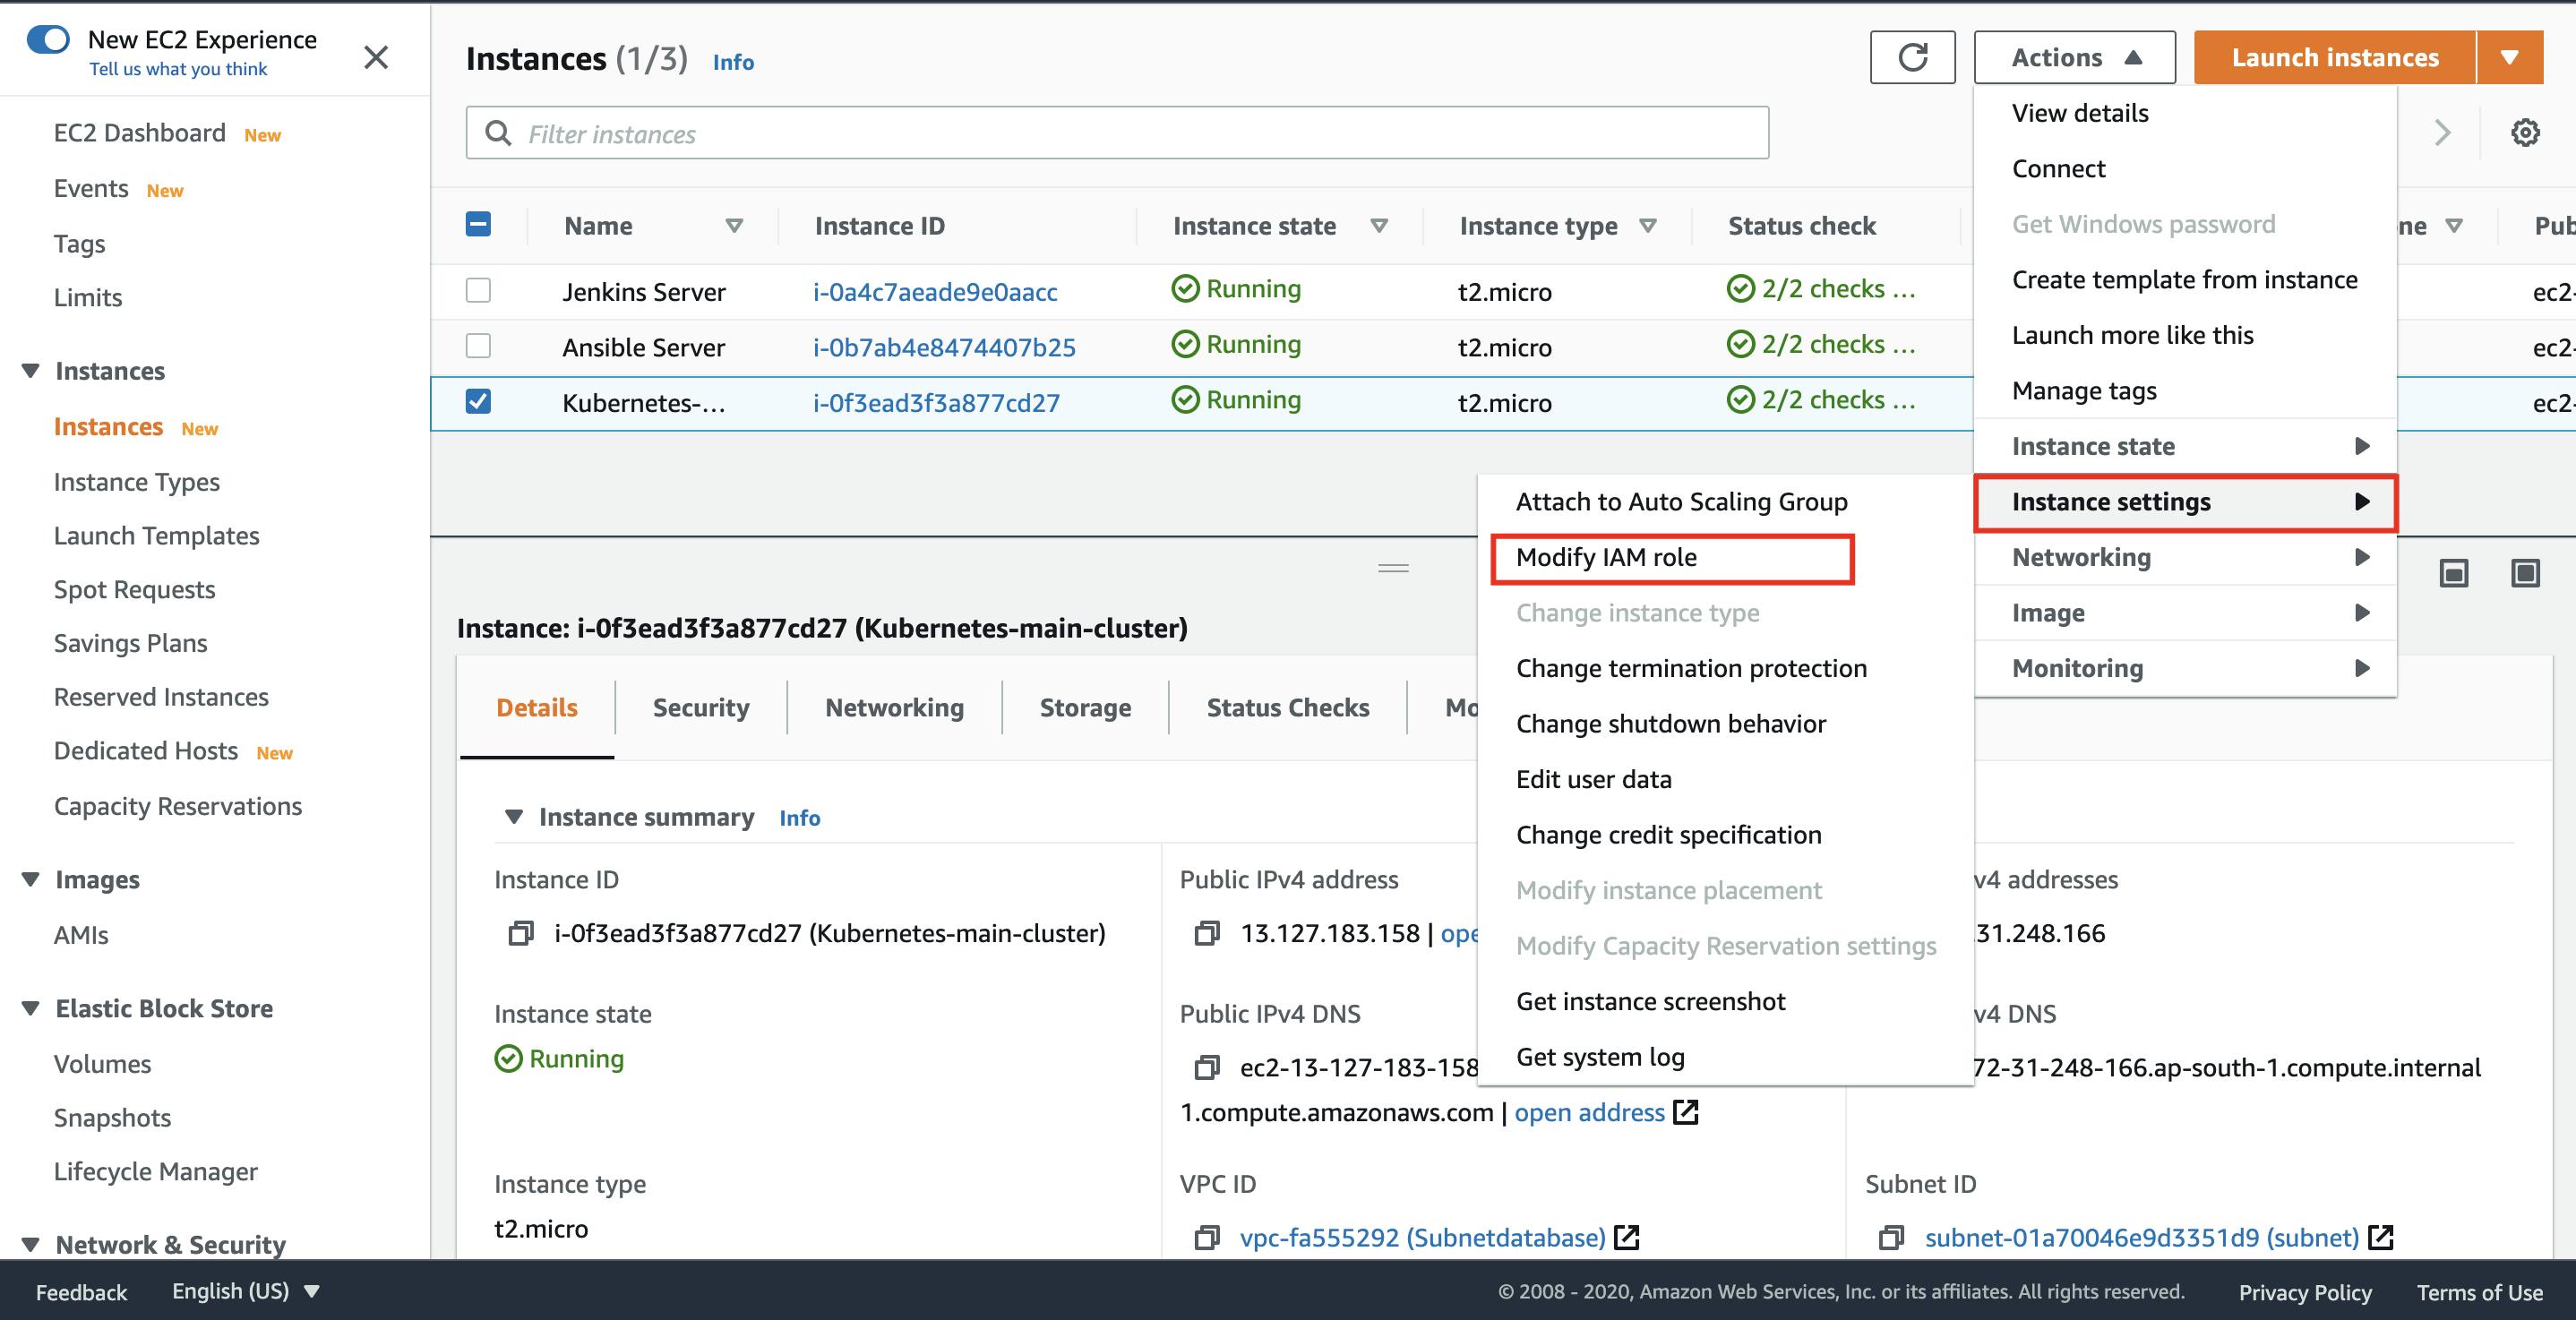
Select the role you have just created in the above step
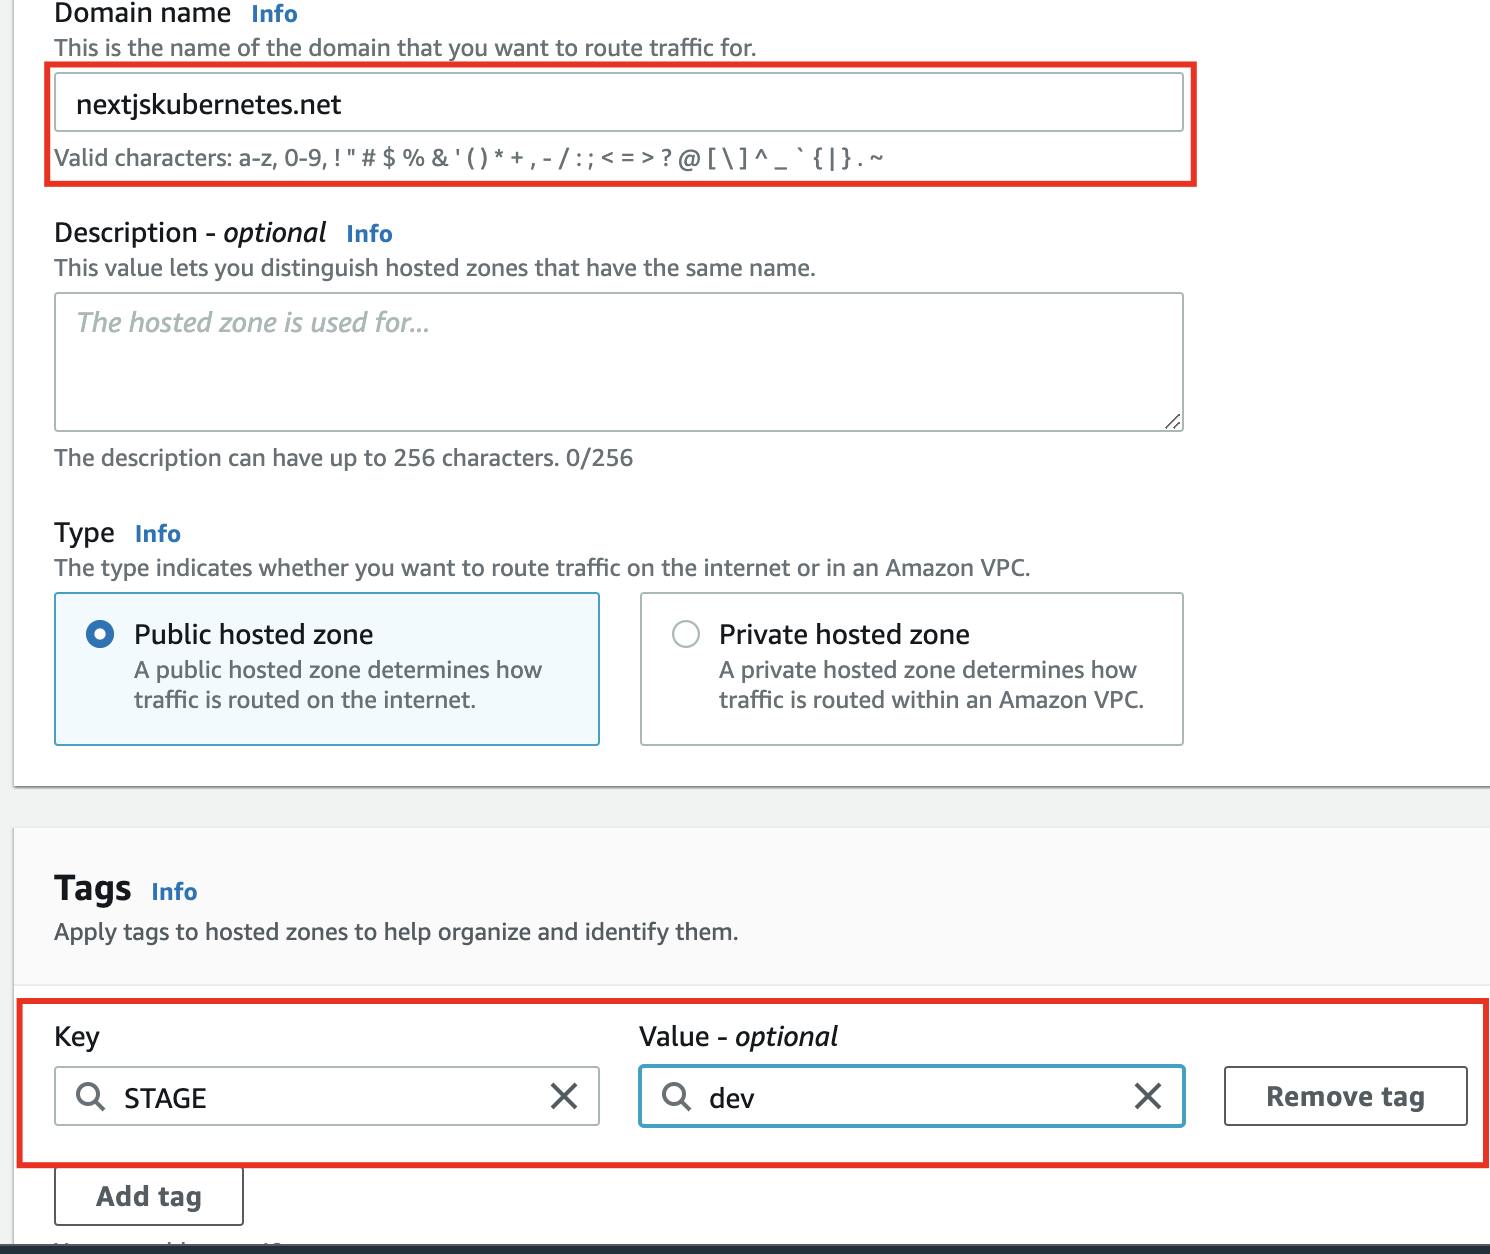
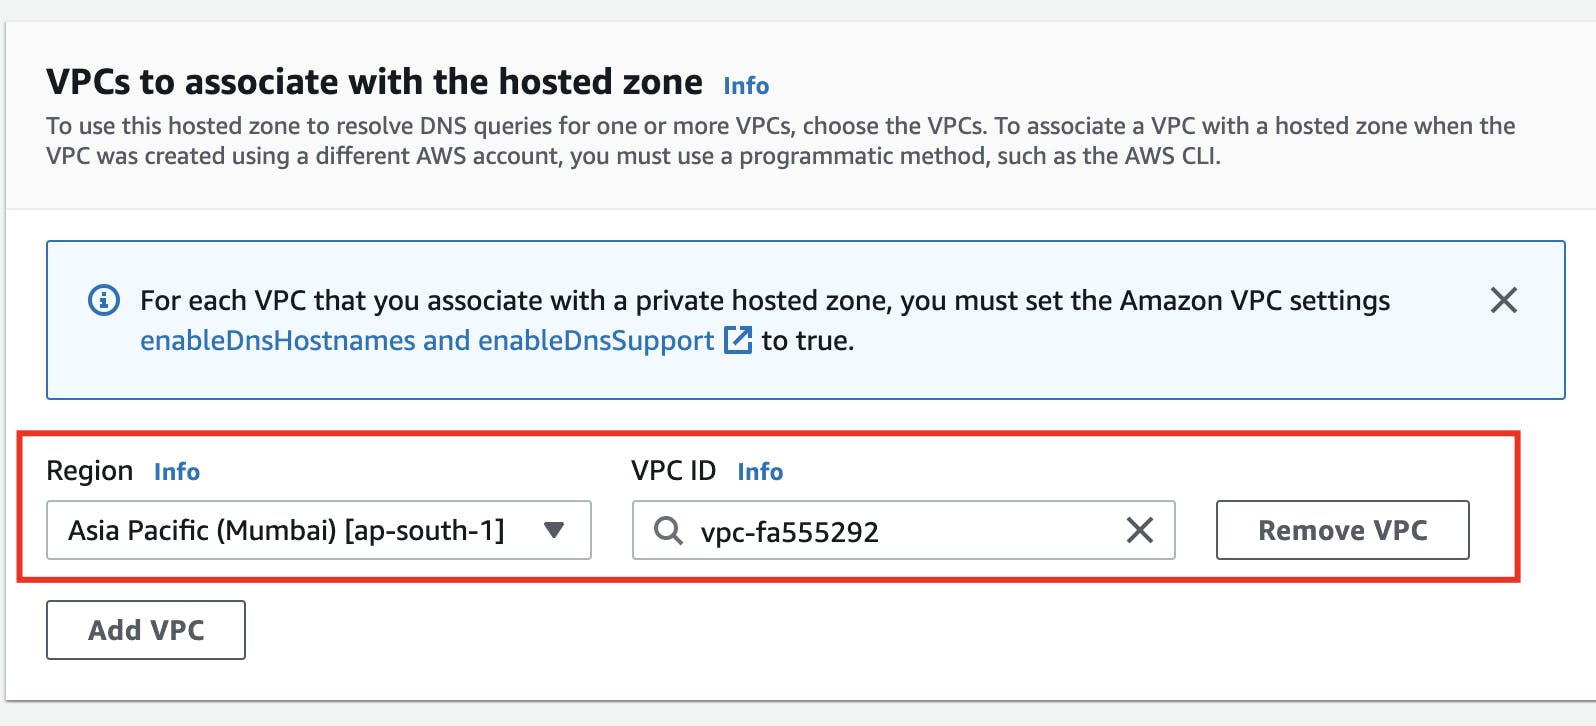
Route53 configuration
Configure the AWS cli
curl https://s3.amazonaws.com/aws-cli/awscli-bundle.zip -o awscli-bundle.zip
Upgrade our server
apt update -y
Install unzip
sudo apt-get install unzip
Install python
apt install unzip python
Move it to /usr/local/bin/aws
./awscli-bundle/install -i /usr/local/aws -b /usr/local/bin/aws
Provide programmatic access to our instance
- Enter all the credentials
aws configure
Install Kubectl
curl -LO https://storage.googleapis.com/kubernetes-release/release/$(curl -s https://storage.googleapis.com/kubernetes-release/release/stable.txt)/bin/linux/amd64/kubectl

chmod +x ./kubectl

sudo mv ./kubectl /usr/local/bin/kubectl
Now, let's install KOPS on our Ubuntu instance
- KOPS helps you create, destroy, upgrade and maintain production-grade, highly available, Kubernetes clusters from the command line.
curl -LO https://github.com/kubernetes/kops/releases/download/$(curl -s https://api.github.com/repos/kubernetes/kops/releases/latest | grep tag_name | cut -d '"' -f 4)/kops-linux-amd64

 chmod +x kops-linux-amd64

 sudo mv kops-linux-amd64 /usr/local/bin/kops
Create an S3 bucket
- We are creating the S3 bucket as a pre-requisite, as we want to store the state of our Kubernetes cluster
- From the terminal, provide the same name as your Route53 hostname
aws s3 mb s3://nextjskubernetes.net
Expose the environment
export KOPS_STATE_STORE=s3://nextjskubernetes.net
Generate ssh keys
ssh-keygen
Creating the Kubernetes cluster
Now comes the interesting part to create the cluster. You can reuse existing VPC (kops will create a new subnet in this VPC) by providing the vpc-id option. The following command will give you details what all things are going to happen:
#create cluster definition
kops create cluster --cloud=aws --zones=ap-southeast-1a --name=nextjskubernetes.net  --dns-zone=nextjskubernetes.net --dns private

#create cluster
kops update cluster nextjskubernetes.net --yes
- Now the cluster would be created, you need to wait for 5-10 min and then validate the cluster
Validate the cluster
kops validate cluster
- Once the cluster is validated, we can get the nodes and that should list all the nodes available. You should be able to see at least 3 nodes with one master node
kubectl get nodes
Log in to the master node
ssh -i ~/.ssh/id_rsa admin@api.nextjskubernetes.net
Authorize the Ansible server to have access of Kubernetes master server before we create the Jenkins job, Ansible playbooks and deploy our app on Kubernetes.
- Login to the Ansible server
- Go to
cd ~/.ssh

#copy the public key.
cat id_rsa.pub
- Paste the public key to the authorized_keys inside the Kubernetes server, so that the Ansible server has the access to the Kubernetes server.
cd ~/.ssh

cat authorized_keys

#add the public key to authorized_keys file

cat > authorized_keys
- Now login to the k8s master IP from the Ansible.
[ansadmin@ip-172-31-59-7 .ssh]$ ssh -i ~/.ssh/id_rsa admin@13.234.67.231(public IP of the master node of k8s server)
Kubernetes Deployment Architecture
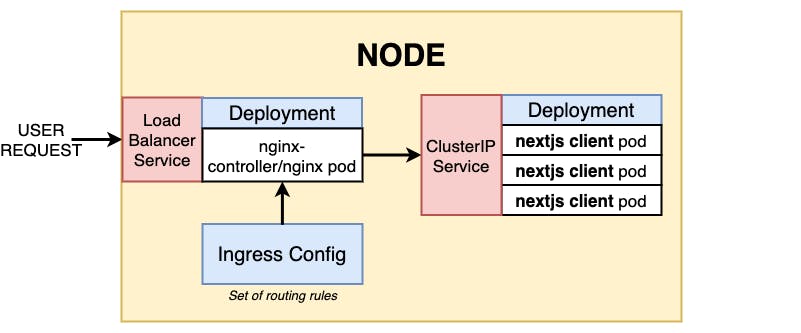
- As seen in the above image, our application is exposed by Nginx Ingress to all the client's requests/external traffic. Kubernetes Ingress is a built-in load balancing framework for routing external traffic.
- ClusterIP exposes a service to other pods only within the same cluster. This service is accessed using Kubernetes proxy.
Let us create the service and deployment file to deploy to Kubernetes server.
Login to the Kubernetes master and create the folder K8s.
Create a client-deployment.yml file and Insert the below lines
apiVersion: apps/v1
kind: Deployment
metadata:
  name: client-deployment
spec:
  replicas: 3
  strategy:
    type: RollingUpdate
    rollingUpdate:
      maxSurge: 1
      maxUnavailable: 1
  selector:
    matchLabels:
      component: web
  template:
    metadata:
      labels:
        component: web
    spec:
      containers:
        - name: client
          image: 583044482327.dkr.ecr.ap-south-1.amazonaws.com/nextjs:latest
          ports:
            - containerPort: 8080
- apiVersion - version of the Kubernetes API
- kind - Deployment is the kind of the object we would like to create
- metadata - name - To identify the project, we need to provide namespace
Spec
- replicas - Specify that you want three replicas of the application to be running
strategy - Specifies the strategy used to replace old Pods by new ones. "RollingUpdate" is the default value. RollingUpdated deployments support running multiple versions of an application at the same time. More on RollingUpdate.
maxSurge - Specifies the maximum number of Pods that can be created over the desired number of Pods.
- maxUnavailable - Specifies the maximum number of Pods that can be unavailable during the update process.
Selector
- matchLabels - This deployment label selector is immutable after it gets created.
- component - This component is an important part and select component name should be similar which will be used in the service
Template Specifications
component - To run inside the web component
containers
image - Image to create the container and run on port 8080
Create a client-service.yml file and Insert the below lines
apiVersion: v1
kind: Service
metadata:
  name: client-cluster-ip-service
spec:
  type: ClusterIP
  selector:
    component: web
  ports:
    - port: 8080
      targetPort: 8080
Service - Kind of the object we would be creating is service. Type - Cluster IP -
- We would be using type as ClusterIP.
- ClusterIP accesses the services through a proxy.
- ClusterIP can access services only inside the cluster.
- So basically we use this type of service when we want to expose a service to other pods within the same cluster.
- Port - We would be exposing Kubernetes service on port 8080
- TargetPort - TargetPort is the port on which the service will send requests to.
Ingress Nginx Controller
We would be using Nginx webserver to create the load balancer. This will help us when our application might have several components. Your application might have some databases, Redis cache, Elasticsearch, content management system. This will help the request to redirect to these services accordingly.
You can also use HAProxy server or Candy web server. It will depend on your teams choice.
We are going to use Nginx ingress controller. You can check more about it here.
- Create an ingress-nginx.yml and insert below lines
apiVersion: extensions/v1beta1
kind: Ingress
metadata:
  name: ingress-service
  annotations:
    kubernetes.io/ingress.class: nginx
    nginx.ingress.kubernetes.io/rewrite-target: /$1
spec:
  rules:
    - http:
        paths:
          - path: /?(.*)
            backend:
              serviceName: client-cluster-ip-service
              servicePort: 8080
Ingress Nginx is a collection of routing rules that govern how the external users access services running on the Kubernetes cluster. Ingress sits in front of the cluster and acts as a router. This is implemented via a proxy.
Reasons to use Ingress Nginx controller:
- Kubernetes ingress Nginx is used as a load balancer.
- You can use AWS or GKE cloud's load balancer as well, but this option is free to use. You can judge based on your deployment scale.
It can make some smarter routing decision based on the rules provided
Run the command manually on the Kubernetes master for deployments
kubetctl apply -f client-deployment.yml
kubetctl apply -f client-service.yml
kubetctl apply -f ingress-nginx.yml
- To know about which pods are running on k8s
kubectl get pods
- To know about which nodes are running on k8s
kubectl get nodes
- To know about which services are running on k8s
kubetctl get svc

OR

kubectl get services
As we have created Ansible playbooks to deploy Next.js on Ansible server, we would now create Ansible playbooks to deploy our application on Kubernetes server.
- Create kubernetes-nodejs-deployment.yml playbook inside the root of our project folder
---
- name: Create pods using deployment
  hosts: kubernetes
  become: false
  user: ubuntu

  tasks:
    - name: create a deployment
      command: kubectl apply -f k8s/client-deployment.yml

    - name: update deployment with new pods if image updated in amazon ecr
      command: kubectl rollout restart deployment.v1.apps/client-deployment
- We would require two tasks to be created for client-deployment playbook First, we need to apply the deployment.
Second task is update the deployments whenever a image in the amazon ECR is updated. This means that whenever the build is run on the latest code, it will rollout and restart the deployment using service deployment.v1.apps/client-deployment. To know more on rollingUpdate, visit the official site, here.
Create a kubernetes-nodejs-service.yml playbook and insert below lines
---
- name: create service for deployment
  hosts: kubernetes
  become: false
  user: ubuntu

  tasks:
    - name: create a service
      command: kubectl apply -f k8s/client-cluster-service-ip.yml
We would apply the client service task. I mostly like to create a different playbook for different task to run, depending on the sequences on which the tasks will run.
Create the kubernetes-nginx-service.yml playbook and insert below lines
---
- name: create service for deployment
  hosts: kubernetes
  become: false
  user: ubuntu

  tasks:
    - name: create a service
      command: kubectl apply -f k8s/ingress-nginx.yml
- We would apply the Kubernetes Nginx ingress controller on the Kubernetes master. This will allow the cluster to expose to external traffic so that the world can access your application.
We can also create Jenkins jobs and the run all the commands to run the Ansible playbooks and execute on the shell. To learn more about how the jobs are created, you can visit our previous article.
- To get the namespace to access our application, run the below command.
kubectl get svc --all-namespaces
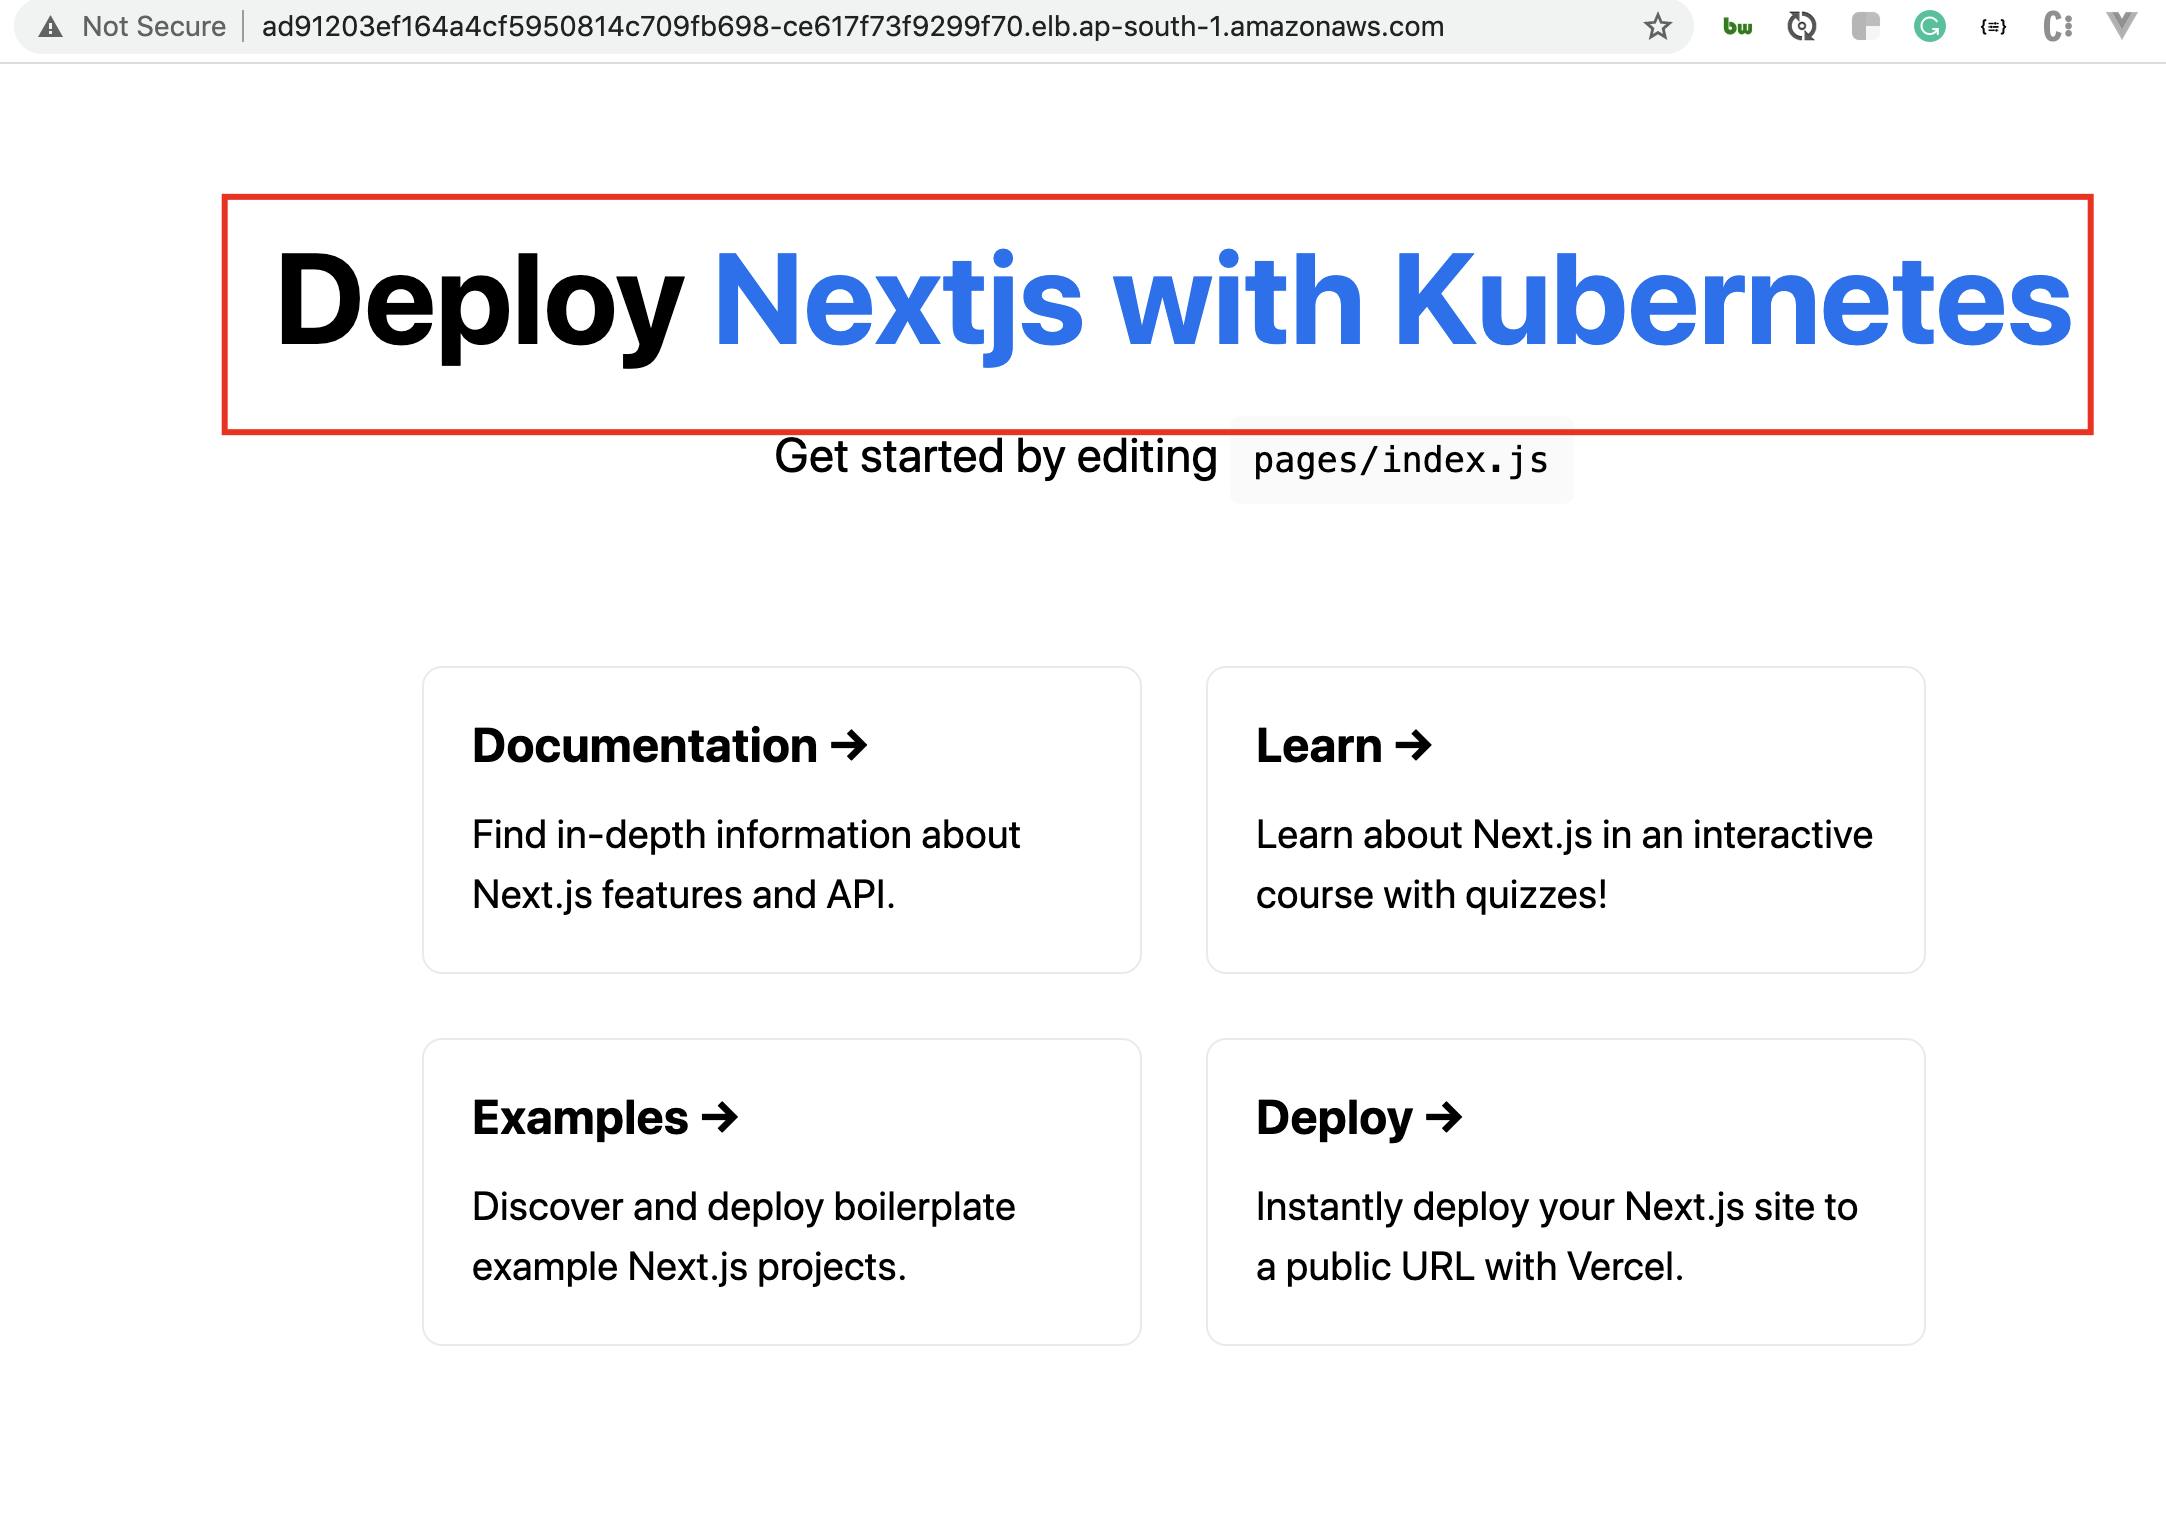
- This will provide the load balancer URL to access our application as seen below
Finally, Make sure to delete the cluster, once you are done with the application deployment and testings
kops delete cluster nextjskubernetes.net --yes
Conclusion
If you made it this far congratulation! 🎉 In this article, we learned how to install Kubernetes on the AWS Ubuntu instance, how we can create the Ansible playbooks, how we can deploy the application on Kubernetes🎉
We can also apply similar learning and deploy Node.js, Angular, React, Vue, and all the Javascript applications in a similar fashion🔥
Until then feel free to explore the world of DevOps🔥
Let me know if you face any issues or have any query in the comment section below.
Follow me on Twitter | Check out my LinkedIn | See my GitHub